Are you looking to set up Google Ads conversion tracking for Shopify but unsure how to proceed? In this article, I’ll demonstrate 2 methods to help you establish Google Ads conversion tracking on your Shopify store. By following this guide, you’ll have all the steps you need right at your fingertips. Let’s get started!
Why Use Google Ads Conversion Tracking with Shopify?
Here are the key reasons why you should use Google Ads conversion tracking with your Shopify store:
Measure Ad ROAS
Without conversion tracking, you’re essentially throwing money at ads without knowing if they’re generating sales. Conversion tracking helps you understand how effectively your ads turn clicks into customers, allowing you to calculate your return on ad spend (ROAS). This empowers you to focus your budget on the ads that deliver the best results.
Optimize Campaigns for Conversions
Conversion tracking reveals which ads, keywords, or audience targeting strategies are driving the most sales. With this knowledge, you can optimize your campaigns by allocating more resources to high-performing elements and refining those that aren’t converting well.
Gain Customer Insights
Conversion tracking goes beyond just sales. You can track other valuable actions like signups, downloads, or adding items to carts. This data unveils user behavior patterns and helps you understand your target audience better. By tailoring your ad strategy to their interests and needs, you can attract more qualified leads and increase conversions.
How to Set up Google Ads Conversion Tracking for Shopify?
In this section, I will introduce 2 primary methods for establishing Google Ads conversion tracking: Using the Google & YouTube app or manually inserting the code on your Shopify site.
Option 1: Manually configuring Google Ads conversion tracking
As previously mentioned, this process is more complex. If you’re not comfortable with coding, it’s best to involve your developer.
Unlike before, where the app managed everything, now you need to manually create the conversion action, install the global site tag, and place the event snippet where you want to track actions, like purchases.
Additionally, you must adjust the existing event snippets to include the revenue from each purchase dynamically.
Step 1: Establish a conversion action within Google Ads
To set up the action, go to the Measurement tab in Google Ad Manager and click on the Conversions option.
Choose “+ New conversion action” located at the top of the page.
Afterward, opt for the ‘Website’ choice.
Google will request your website URL to scan and check if any code is already set up.
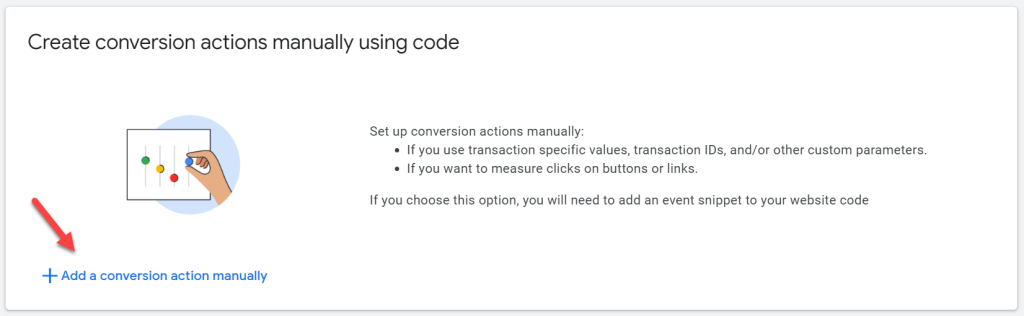
However, since you also require Google to pass us the purchase value, you’ll need to scroll down to the bottom of the page and manually create our conversion action using the provided option.
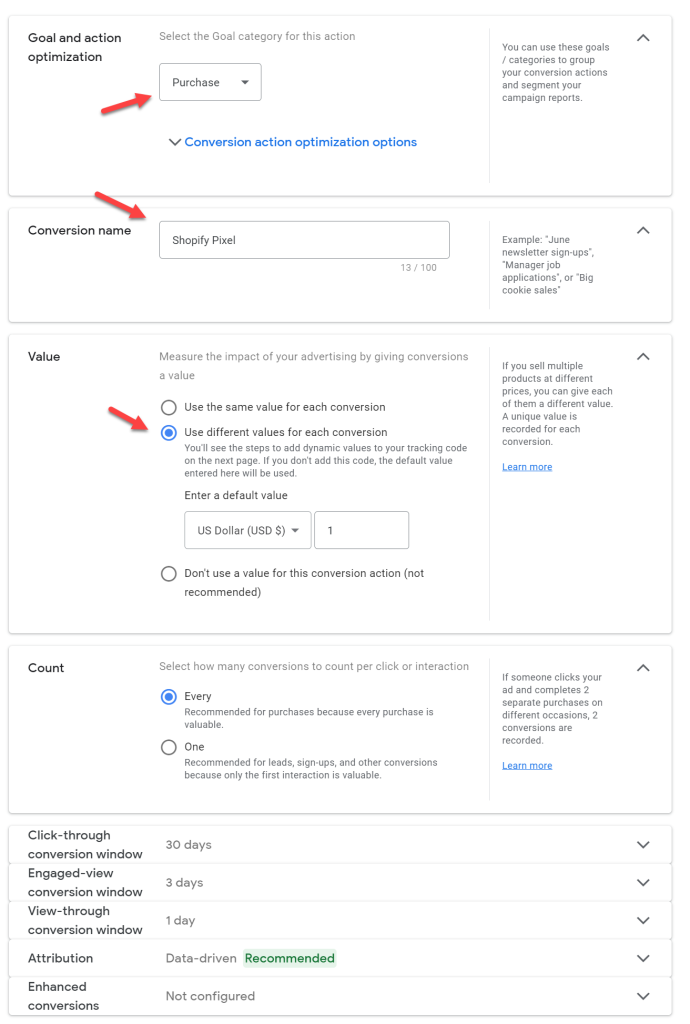
In the popup, you’ll need to provide details about the events. Keep it straightforward by naming it “Purchase”. Ensure to select the ‘Use different values for each conversion’ option under the Value tab to track the prices of all items. Once done, click on the ‘Save’ option at the bottom of the page.
After adding your code, you’ll have the event snippet for the newly added conversion. However, it’s essential to add our Google Tag to the entire site and edit the event snippet before finalizing everything. Keep this tab open in another window for later reference.
Step 2: Implement Google Tag on Shopify
At the final stage of the setup process, Google will offer the choice to install the tag either manually or automatically. Opt for the ‘Install manually’ option and copy the code provided to your clipboard.
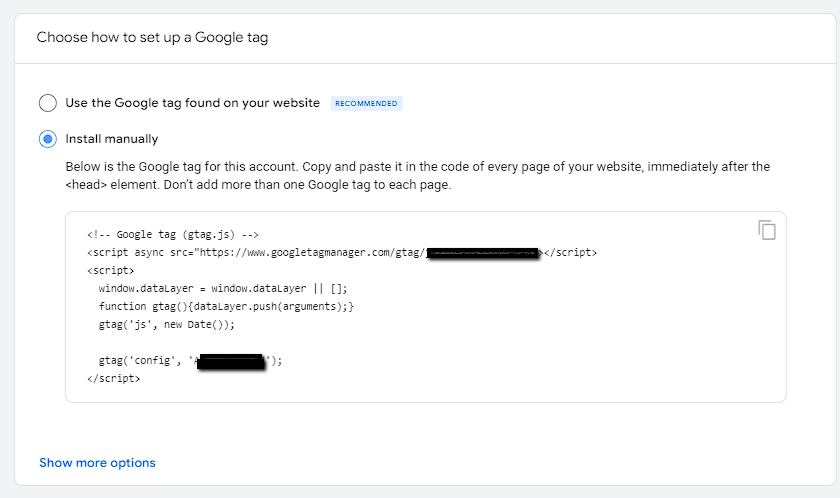
- Open your Shopify admin in another browser window and select ‘Online Store’.
- Click the … button and choose ‘Edit code’.
- Access your theme.liquid file.
- If it’s your first time installing a global site tag, paste the copied code between the <head> and </head> tags to apply it to every page in your store.
- If you’re updating an existing global site tag, find it in your theme.liquid file and modify the code per Google Ads’ suggestions.
- Save your changes.
Step 3: Embed the event snippet into Shopify
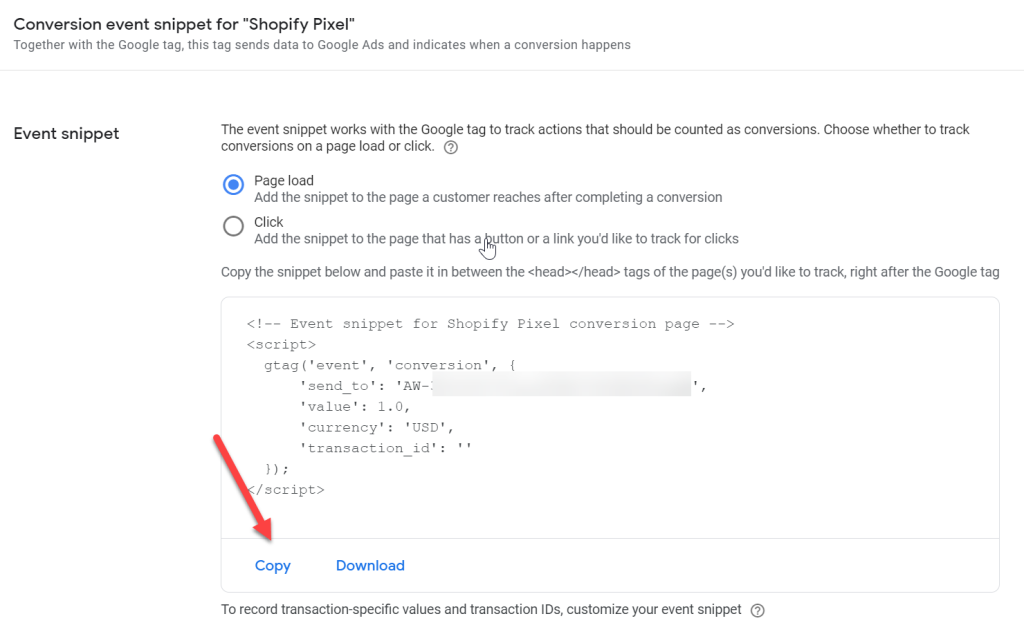
This final step can be a bit challenging because it requires us to modify the code snippet obtained from Google before inserting it into Shopify. Return to the conversion action you previously created and choose the ‘Page load’ option. Then, copy the code snippet.
In a separate browser window, access your Shopify admin and navigate to ‘Settings’ > ‘Checkout’. In the Additional scripts text box, insert the event snippet. If there’s existing code in the Additional scripts text box, append the event snippet in a new line below the current code.
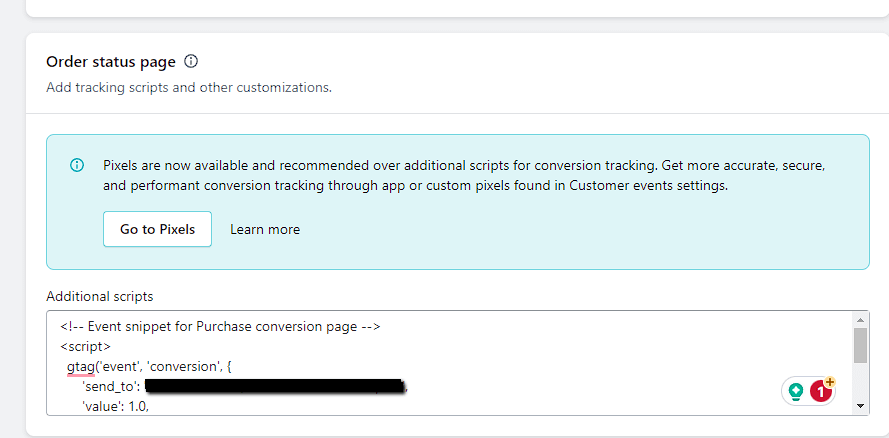
Copy the global site tag which is used in the ‘Install the global site tag’ step. Place this tag above the event snippet.
To prevent duplicate conversions if a customer reloads the checkout page, include tags before and after the event snippet:
- Paste {% if first_time_accessed %} on the line before the snippet.
- Paste {% endif %} on the line after the snippet.
The default currency is USD. If your store uses a different currency, replace ‘USD’ in the event snippet with ‘{{ currency }}’.
By default, the transaction ID is blank. To avoid duplicate conversions, replace ” with ‘{{ order_number }}’ next to ‘transaction_id’.
Save your changes.
If your store sells items with varying prices, adjust the value section of the code:
- To exclude taxes and shipping from the conversion amount, replace it with: ‘value’: {{ checkout.subtotal_price | divided_by: 100.0 }},
- To include taxes and shipping in the conversion amount, replace it with: ‘value’: {{ checkout.total_price | divided_by: 100.0 }}.
After completing these steps, your code should resemble the following example (with your Google code replacing ‘1234567’):
{% if first_time_accessed %}
<! — Event snippet for Test conversion page – ->
<script>
gtag( ‘event’, ‘conversion’, {
‘send_to’: ‘1234567’,
‘value’: {{ checkout.subtotal_price | divided_by: 100.0 }},
‘currency’: ‘{{ currency }}’,
‘transaction_id’: ‘{{ order_number }}’,
}) ;
</script>
{1% endif %}
Since I’ve only provided an example for purchase conversions above, you’ll need to revisit and configure conversion actions for the remainder of the funnel (such as add to cart, initiate checkout, etc.).
Congratulations, your tracking setup is now complete and ready for use! Please note that it may take a few hours for all data to synchronize in the backend and for actions to be displayed accurately.
Option 2: Using Google & YouTube app
This method is the simplest option available. However, there are a few requirements you need to fulfill before using it:
To use Google & YouTube channels, ensure your Shopify store meets Google Merchant Center requirements: No password protection, a valid payment provider, added refund policy and terms of service in the footer, visible contact information, and shipping to supported countries in the appropriate currency.
You must also have a Google Merchant Center account, which is free and takes only a few moments to register. Once you have fulfilled all these requirements, you can complete the setup on Shopify by following these steps:
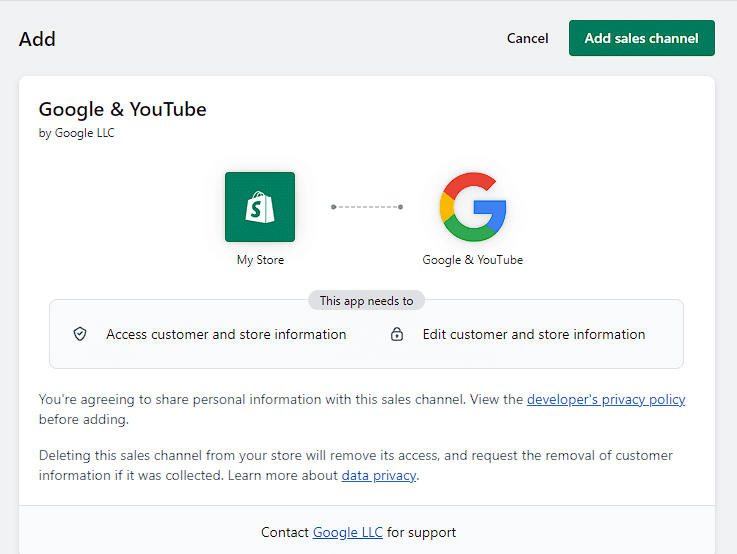
Log in to your Shopify account and navigate to the Google & YouTube app. Click ‘Add app’ on the app store page.
On the subsequent page, you will be prompted to authorize the connection. Click ‘Add sales channel’ at the top of the page.
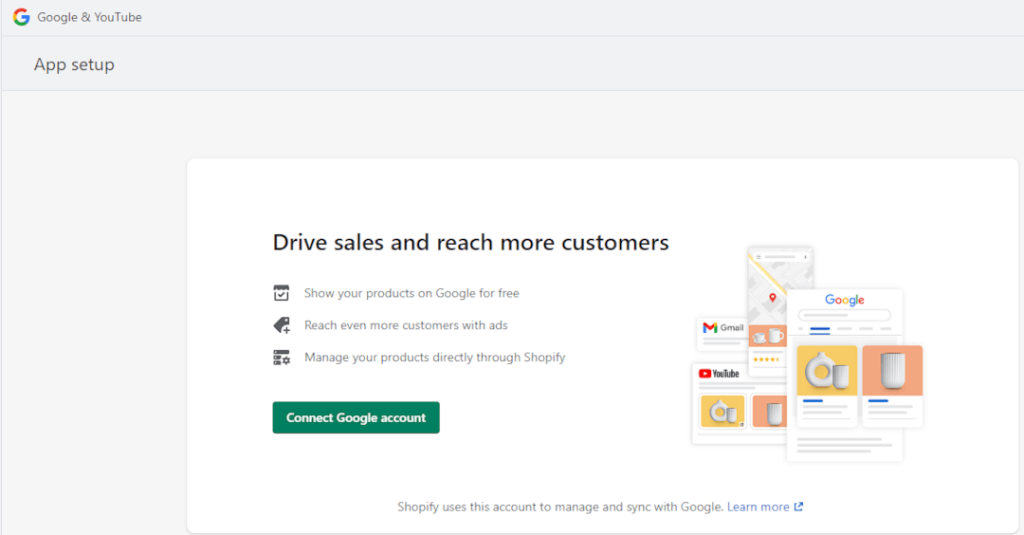
To link your Google account to Shopify, click on the ‘Connect Google account’ button on the following screen.
In the popup window, choose the Google account you wish to link and click ‘Next’.
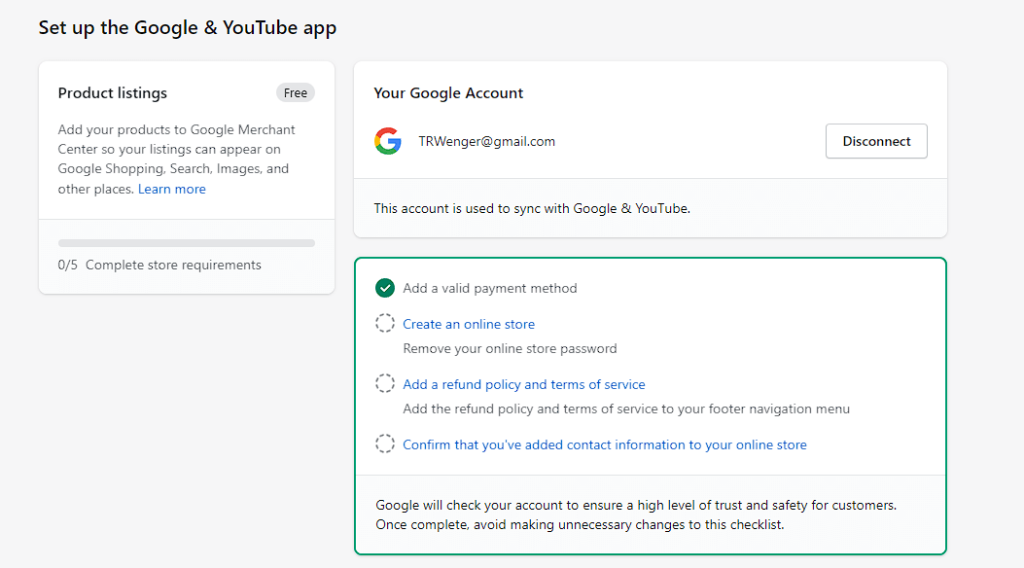
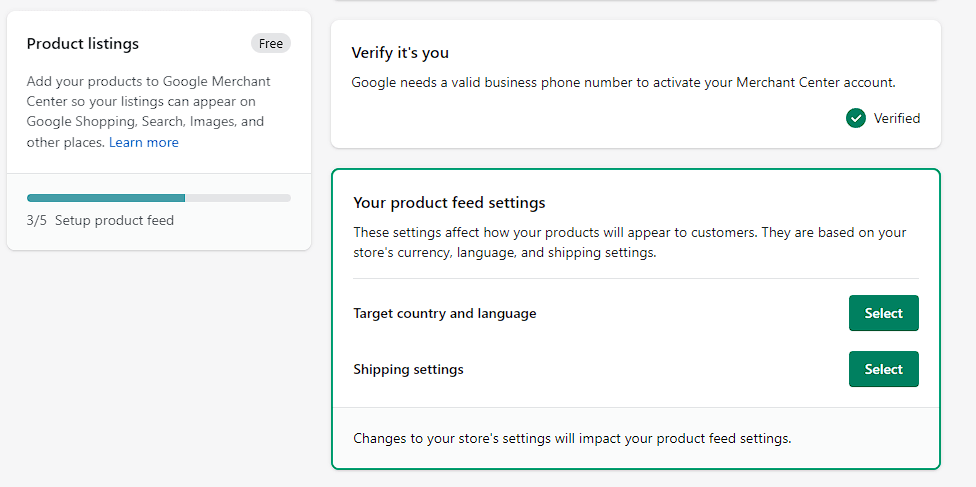
If you haven’t completed all the necessary requirements to connect the two platforms, you’ll see a checkbox on the subsequent page listing the steps you need to take before finalizing the setup.
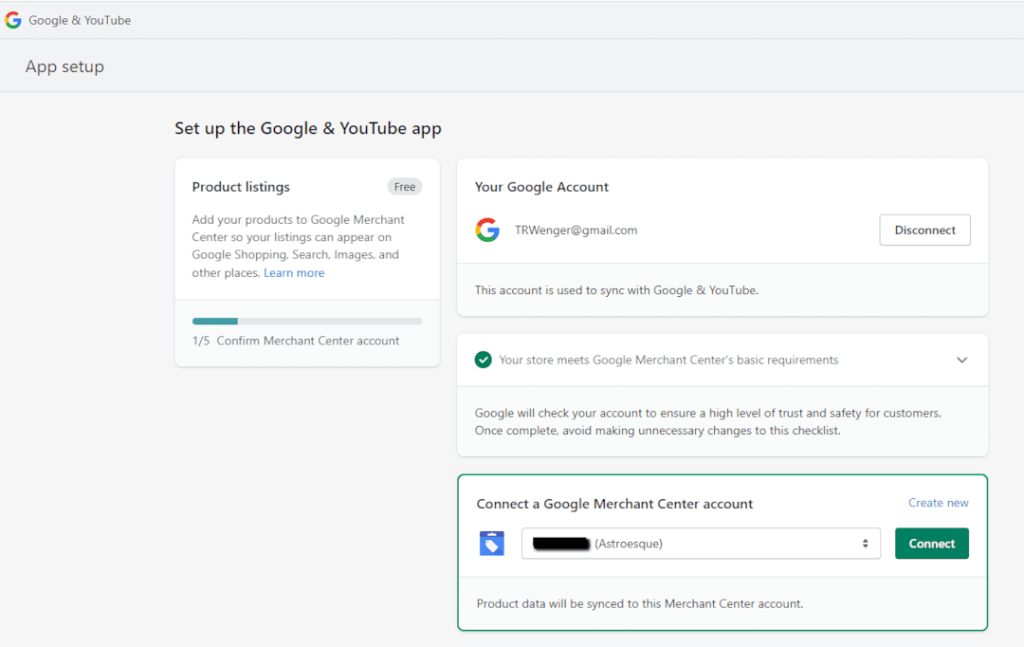
Following that, you’ll need to connect the Google Merchant Account (GMA) you created previously. If the GMA account and the Google account you connected earlier share the same email, the GMA will automatically populate in the field. Click ‘Connect’ on this page to complete the connection between the 2 accounts.
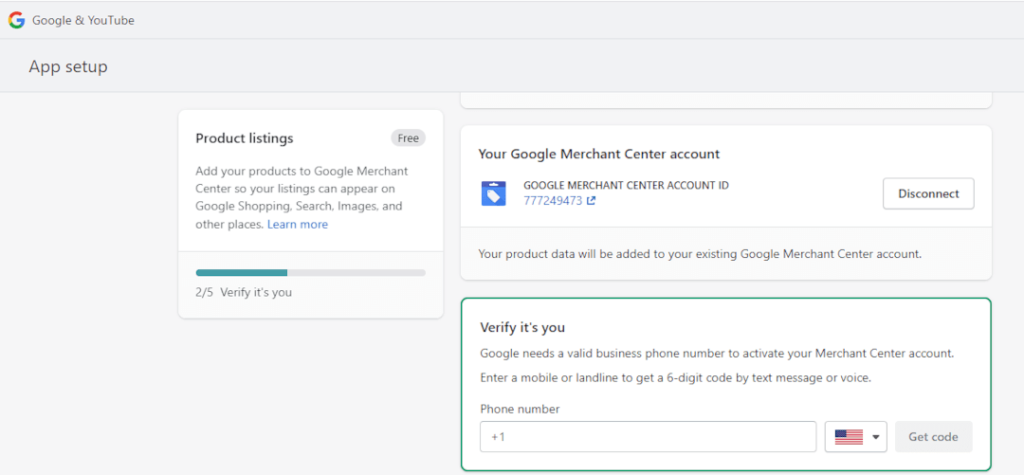
Following that, Google will require you to verify your identity via phone. Enter your phone number and the code you receive to finalize the process.
In the subsequent step, you’ll need to configure your product feed settings so Google can display your products in Google Search, Shopping, and Images. Simply input your shipping locations and shipping settings using the provided boxes below.
Lastly, accept the terms and conditions to finalize your setup!
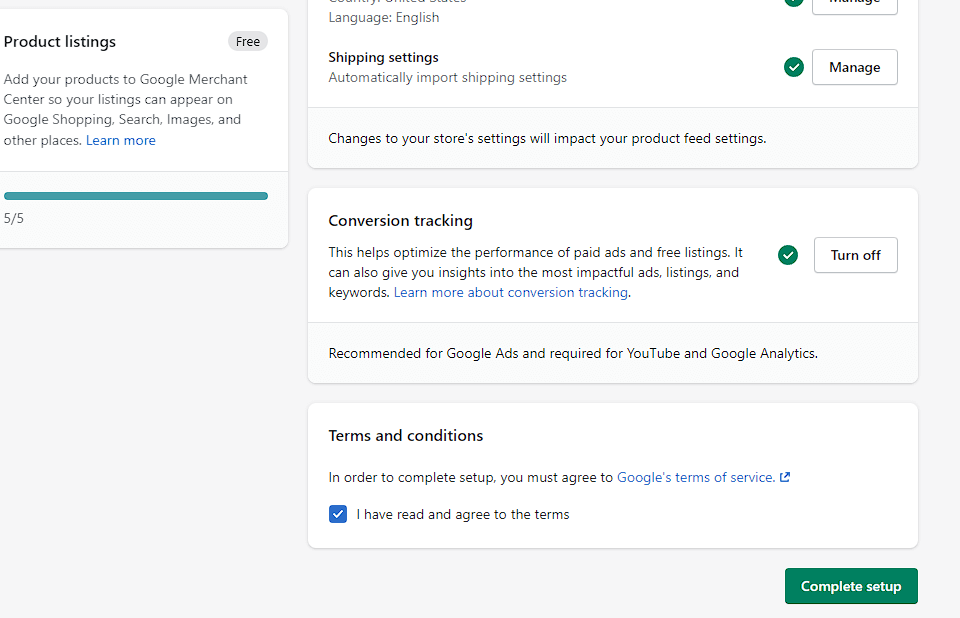
The system may take up to an hour for all your products to sync to the Google Merchant Center. However, rest assured that your tracking is set up and ready to go!
How to Verify Google Ads Conversion Tracking for Shopify?
Upon configuring the conversion actions, your first task should be to test them to ensure proper functionality. As previously mentioned, it may take some time for this data to synchronize. Typically, I recommend waiting approximately an hour before conducting these tests.
Verifying that Google Ads conversion tracking is set up correctly in your Shopify store using Google Tag Manager (GTM) involves a few crucial steps:
1. Check Tag Configuration
- Access GTM Container: Log in to your Google Tag Manager account and navigate to the container associated with your Shopify store.
- Locate Conversion Tag: Identify the Google Ads conversion tracking tag you’ve created. This tag should be under the “Tags” section.
- Verify Settings: Review the tag’s configuration carefully. Ensure the Conversion ID, Conversion Label (if used), and Conversion Type are correct.
2. Test Tag Firing
- Install Google Tag Assistant: Download and install the Google Tag Assistant browser extension.
- Enable Preview Mode: In GTM, switch to “Preview and Debug” mode and select the appropriate preview environment (e.g., “Localhost” if testing locally).
- Visit Checkout Page: Open your Shopify store’s checkout page in a new browser tab.
- Check Tag Activation: In the Google Tag Assistant extension, click the “Preview” button. Verify that the conversion tracking tag is listed under “Fired Tags” and that the tag firing events correspond to the desired checkout actions (e.g., “Page View” on the thank you page).
3. Validate Data in Google Ads
- Access Google Ads Account: Log in to your Google Ads account and navigate to the “Conversions” section.
- Verify Conversion Tracking: Check if conversions are being recorded for your conversion action. If not, investigate any potential issues with the tag configuration or data transmission.
4. Buy Your Own Product
In fact, the simplest method is to purchase one of your own items and verify if it registers. Proceed with a complete purchase transaction for any item available in your store, then navigate to Google Ad Manager. Under the Measurement tab, access the Conversions option, following the same steps as previously outlined.
Find the conversion action you set up earlier. If everything is configured properly, you’ll notice its status as active along with the count of conversions and their respective values displayed here.
Conversion Tracking Common Issues and How to Troubleshoot?
The setup is done, but Google Ads conversion tracking for Shopify not working? Here are some common issues you might encounter when setting up Google Ads conversion tracking on your Shopify store, along with troubleshooting steps to help you resolve them:
1. No Conversions Registering
Incorrect conversion setup in Google Ads or Shopify (mismatched IDs, wrong conversion type).
Tracking tag not firing properly on the desired checkout page (e.g., thank you page).
Data layer issues (GTM only) preventing information from reaching Google Ads.
Troubleshooting:
- Double-check: Verify Conversion ID, Label (if used), and Type in Google Ads and GTM tag configuration (if applicable).
- Test Firing: Use Google Tag Assistant to ensure the tag fires on the correct checkout page.
- Review Data Layer (GTM): If using GTM, confirm the data layer is set up correctly and provides the necessary information for tracking.
2. Delayed Conversions
Google Ads data processing can take some time (usually 24-48 hours) to reflect conversions.
Troubleshooting:
- Allow Time: Wait at least 24-48 hours after a sale for conversion data to appear in Google Ads.
- Monitor Trends: Look for consistent conversion patterns over time, rather than focusing on individual day-to-day fluctuations.
3. Inaccurate Conversion Values
Order value not being passed correctly to Google Ads (dynamic value not set in GTM tag).
Troubleshooting:
Configure Dynamic Value (GTM): If using GTM, ensure the tag is configured to capture the dynamic order value from your Shopify data layer.
4. Tracking Code Issues (Shopify App Only)
Shopify Google Ads app might not be properly installed or connected.
Troubleshooting:
- Reinstall App: If using the Shopify Google Ads app, try reinstalling it to ensure a clean setup.
- Contact Shopify Support: If reinstallation doesn’t resolve the issue, reach out to Shopify support for further assistance.
5. General Troubleshooting Tips from Mega Digital
- Clear Cache and Cookies: Sometimes, cached data can interfere with tracking. Try clearing your browser’s cache and cookies before testing.
- Use Incognito/Private Window: Test your checkout process and conversion tracking in an incognito or private window to rule out browser extension conflicts.
- Consult Support: If you’re still encountering issues, reach out to Google Ads support or a Google Partner Agency for further assistance.
Wrap up
Google Ads conversion tracking for Shopify is a game-changer for Shopify store owners looking to elevate their advertising efforts and drive measurable results. By implementing conversion tracking effectively and leveraging the insights it provides, you can optimize your campaigns, increase conversions, and achieve your e-commerce goals.
Ready to take your Shopify store to new heights with Google Ads conversion tracking? Follow our step-by-step guide and unlock the power of data-driven advertising today!