
Are you seeking an in-depth Google Tag Manager guide? Look no further! This guide will walk you through everything you need to know about Google Tag Manager, from its basic elements and functionalities to detailed setup and troubleshooting. Dive in and unlock the full potential of Google Tag Manager!
What Is Google Tag Manager?
Google Tag Manager (GTM) is a robust tool that enables you to manage and implement marketing tags (code snippets or tracking pixels) on your website or mobile app without directly altering the code. This simplifies the process of adding and updating tags, making it easier for marketers to track user behavior and measure the effectiveness of their campaigns.

GTM allows you to track a wide range of activities on your website. This includes user interactions such as page views, clicks, form submissions, and more. By using GTM, you can gather valuable data to enhance your marketing strategies and improve user experience. The answer to the question “what can I track” with GTM is: virtually anything that users do on your site.
Components of Google Tag Manager
Before looking into how GTM works, you need to first know its components and how they interact with one another. GTM consists of several key components: tags, triggers, variables, and data layers. Together, these components allow for efficient and flexible tracking of various metrics.
Tags
Tags are snippets of code that execute specific actions on a web page or mobile app. They help you monitor behaviors like views or clicks for better user understanding. Most tags gather measurement data from your site and send it to tools like Google Analytics.
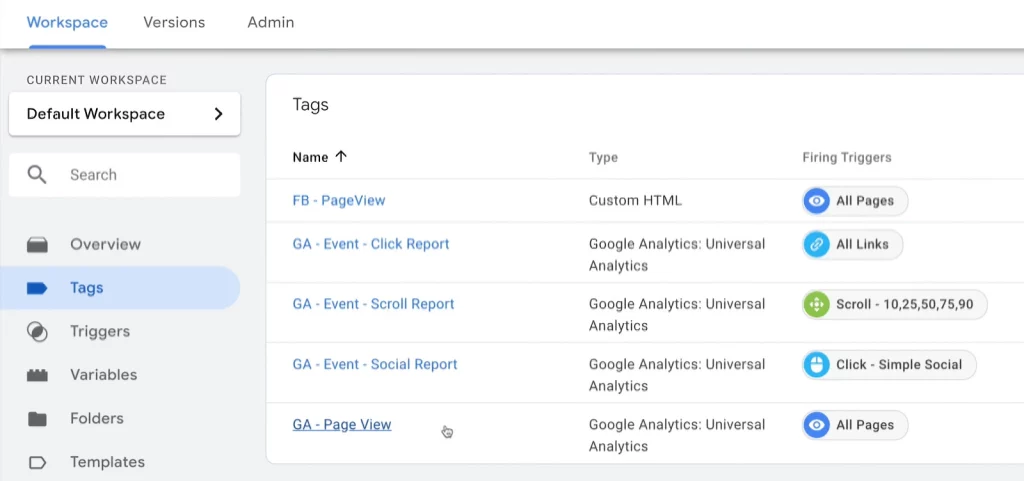
Think of tags as “instructions” you give to GTM. For example, you might have a tag that tells GTM to “record every time someone views a page.”
Triggers
Triggers define when and where your tags should fire. They act as the conditions for a tag to activate. Specifically, they listen to events like clicks, form submissions, or page loads. Then, when any detected event matches the defined triggers, the tags that reference that trigger will fire.
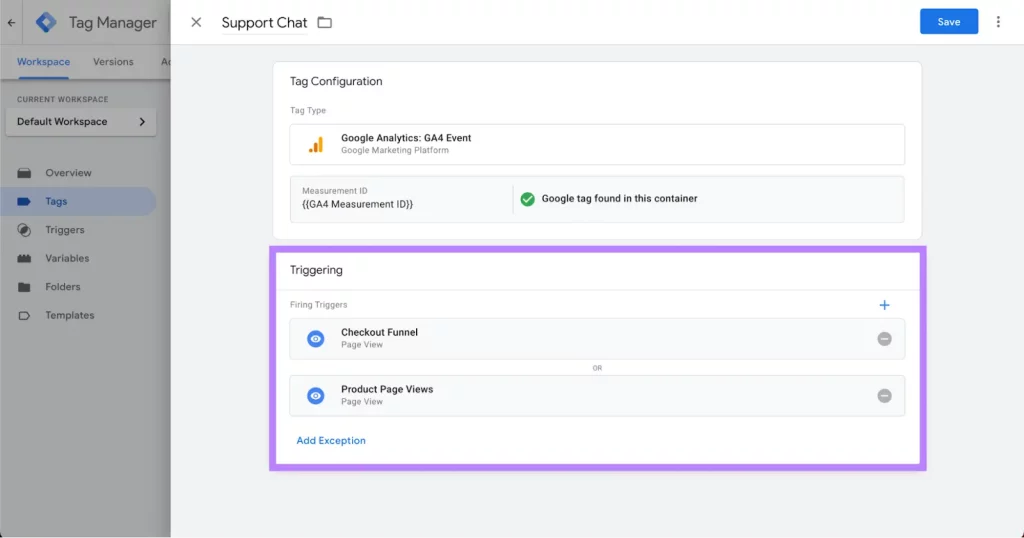
In other words, triggers are the “rules” for when those instructions should happen. For example, you might set a trigger that says, “only record a page view when someone visits the ‘Thank You’ page after making a purchase.”
Variables
Variables store and manage information that tags and triggers need to work, such as a product name, a price value, or a date. For example, you could have a variable that stores the URL of the current page. Variables can be built-in (predefined by GTM) or custom (created by you).
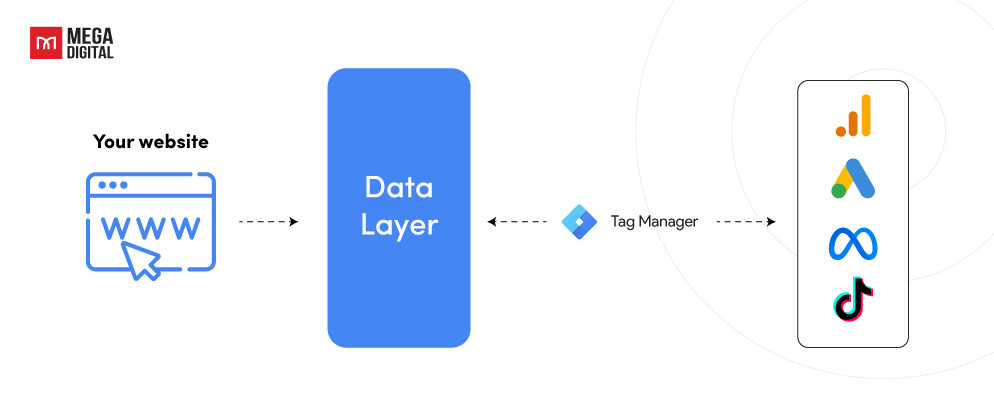
Data layer
GTM implements a data layer to temporarily hold values in the client so that they can be used by tags, triggers, and variables. The data layer is a JavaScript object, acting as a bridge that collects information and passes it to GTM. For example, it might gather details about what a customer bought and send that data to GTM for tracking.
How Does Google Tag Manager Work?
Google Tag Manager operates by placing a single container code on your website, which then allows you to add, edit, and manage multiple tags through the GTM interface.
The tool detects user interactions through built-in listeners and checks if these actions match predefined triggers. If a match is found, the associated tag is activated, injecting the necessary code into the site to process and send data to third-party services like Google Analytics or Facebook Pixel.
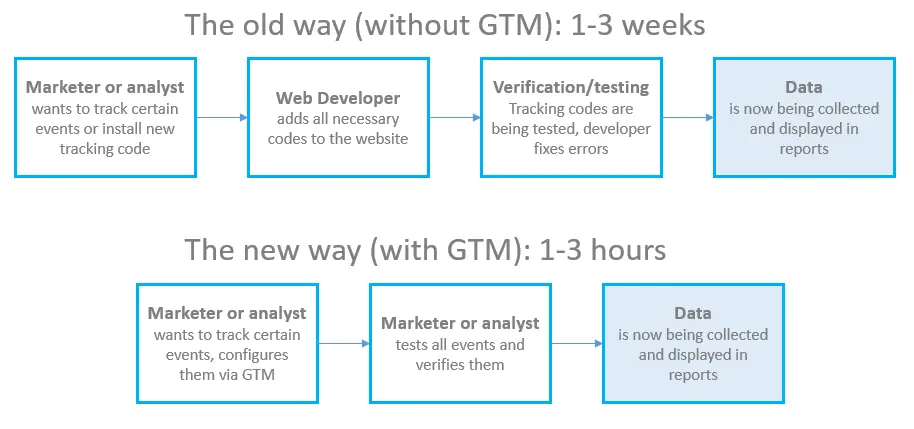
This approach eliminates the need to update code on your site for each new tag, reduces website code clutter, and minimizes implementation errors. Tags can only function with other GTM components called triggers and variables, which determine when to execute the code snippets.
Pros & Cons of Google Tag Manager
Understanding these pros and cons can help you decide if Google Tag Manager is the right tool for your needs and ensure you use it effectively to enhance your website’s tracking and marketing capabilities.
Pros
#1 Flexibility & Diversity
It supports a wide range of tags, including Google Analytics, AdWords, and third-party tags, allowing for comprehensive tracking and marketing automation.
#2 Ease of Use
GTM allows marketers to manage and deploy tags without needing to modify the code directly, making it accessible even for those without extensive technical knowledge.
#3 Built-in Debugging
GTM offers a preview and debug mode, which helps users test and troubleshoot tags before they go live, ensuring accurate data collection.
#4 Efficiency
By centralizing tag management, GTM reduces the need for developer intervention, speeding up the deployment process and minimizing the risk of errors.
#5 Scalability
Whether you’re running a small blog or a large e-commerce site, GTM scales with your needs, making it suitable for businesses of all sizes.
#6 Version Control
GTM maintains a history of changes and versions, allowing users to roll back to previous configurations if something goes wrong, providing a safety net for tag management.
Cons
#1 Learning Curve
For beginners, understanding the full capabilities of GTM can be challenging. While basic tag deployment is straightforward, advanced features and custom implementations can be complex and may require a deeper understanding of JavaScript and website architecture.
#2 Potential for Misconfiguration
Incorrectly setting up tags, triggers, or variables can lead to inaccurate data tracking. Users must carefully test and validate their configurations to ensure reliability. According to a case study by Reflectiz, the percentage of GTM misconfig cases is over 60%, which translates to high risk of improper set up.

How to Set Up Google Tag Manager?
While setting up Google Tag Manager for beginners can be challenging, the process is actually quite straightforward if you have a detailed instruction. Here’s a comprehensive step-by-step guide:
Step 1: Create a Google Tag Manager Account
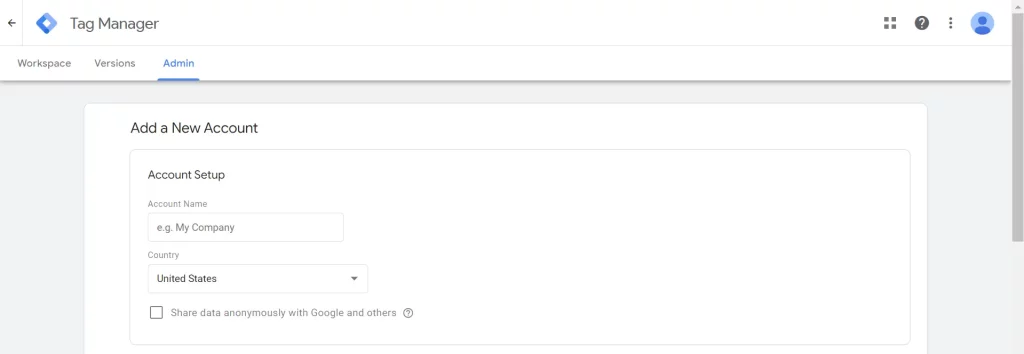
- Visit the Google Tag Manager website.
- Click on “Create account,” enter your account name, and choose your country.
- Tick the “Share data anonymously with Google and others” box (optional).
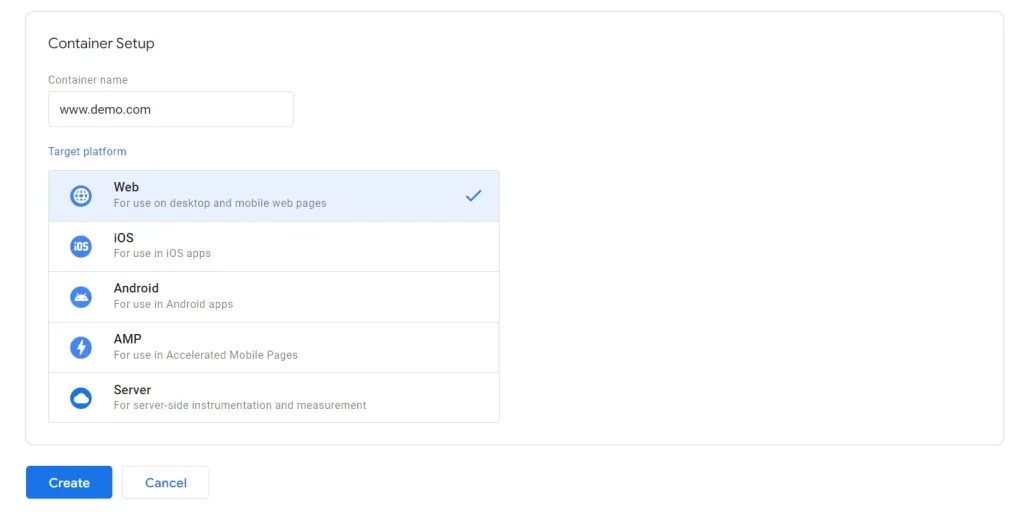
Step 2: Set Up a Container
- Enter a container name (e.g., your website name).
- Select where you’ll use the container (Web, iOS, Android, or AMP).
- Read and confirm agreement to the GTM Terms of Service.
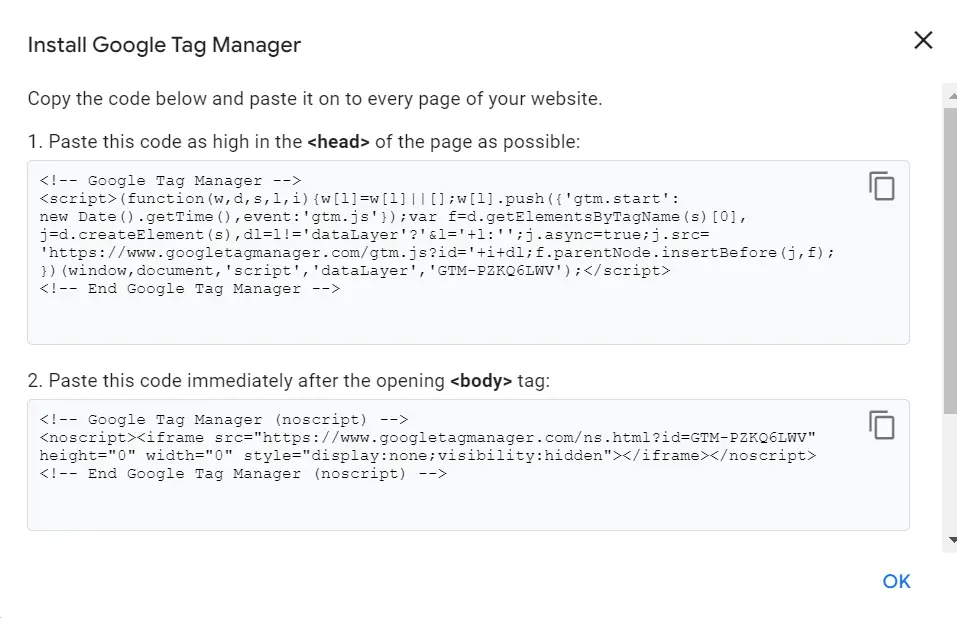
Step 3: Add GTM Code to Your Website/App
- After creating the container, you will see two snippets of code.
- Copy the first snippet and paste it as high as possible into the <head> section of your website.
- Copy the second snippet and paste it into the <body> section of your website, right after the opening <body> tag.
- To test your website, enter your website’s link and then click Test.
- Save and publish your changes.
Step 4: Configure Your First Tag
- In GTM, click on “New Tag,” then choose “Tag Configuration” and select the type of tag you want to add.
- Add the required details for the tag.
- Click on “Triggering” to set up a trigger for the tag.
- Save the tag by clicking “Save.”
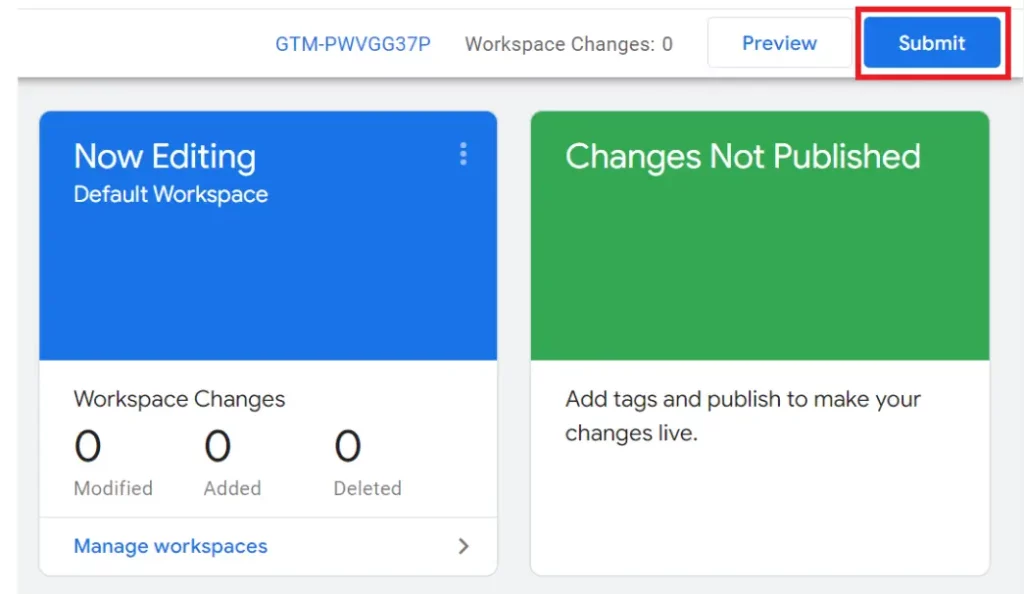
Step 5: Publish Your Container
- After configuring your tags, click on “Submit” in the top right corner.
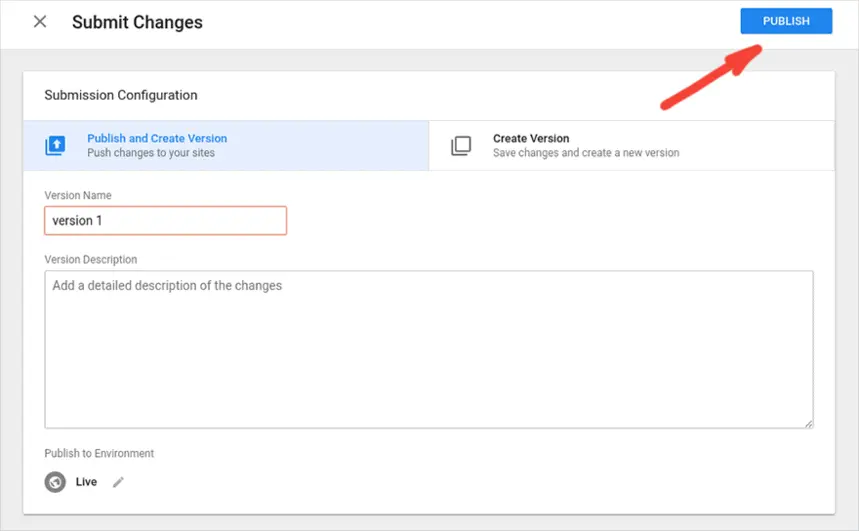
- Add a Version Name and Description for the changes you’ve made.
- Hit “Publish” to make your changes live.
By following these steps, you can successfully set up Google Tag Manager and begin streamlining your tag management processes, improving your website’s tracking and analytics capabilities.
How to Use Google Tag Manager?
If you’re new to Google Tag Manager, we’ll walk you through how to use Google Tag Manager by connecting a Google Analytics 4 property to your site.
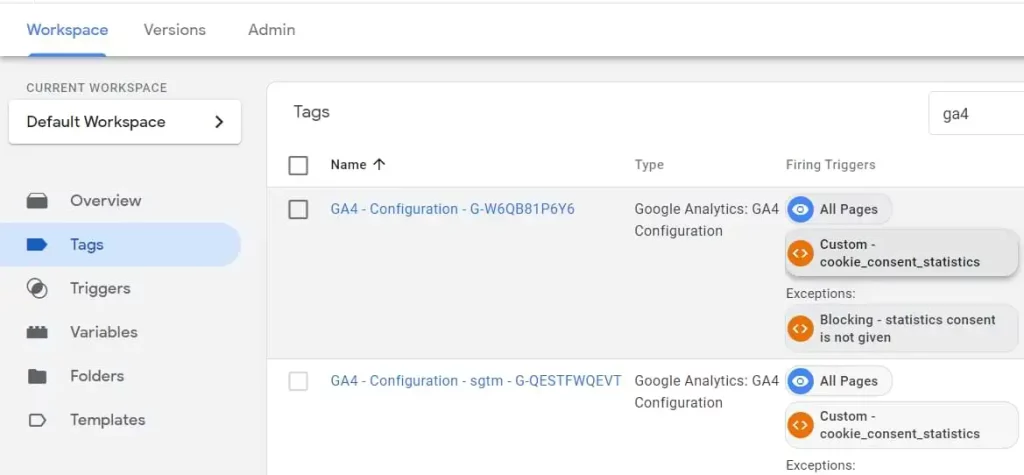
First, log in to your Google Tag Manager account and choose “New Tag” or “Add a new tag.” Next, name your tag, for example, “GA4 Configuration.”

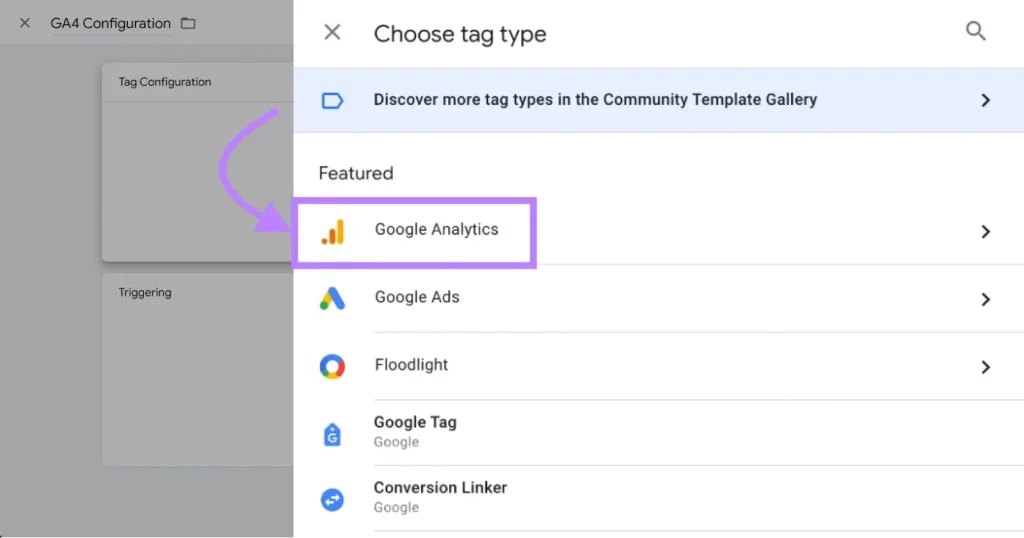
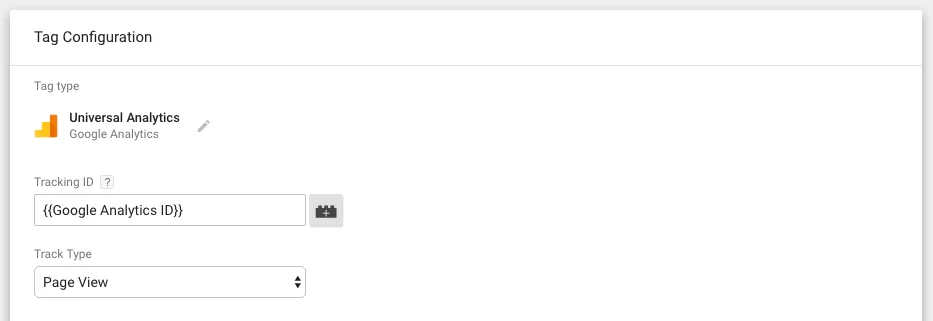
Click on “Tag Configuration,” choose “Google Analytics,” and select “Google Tag.”
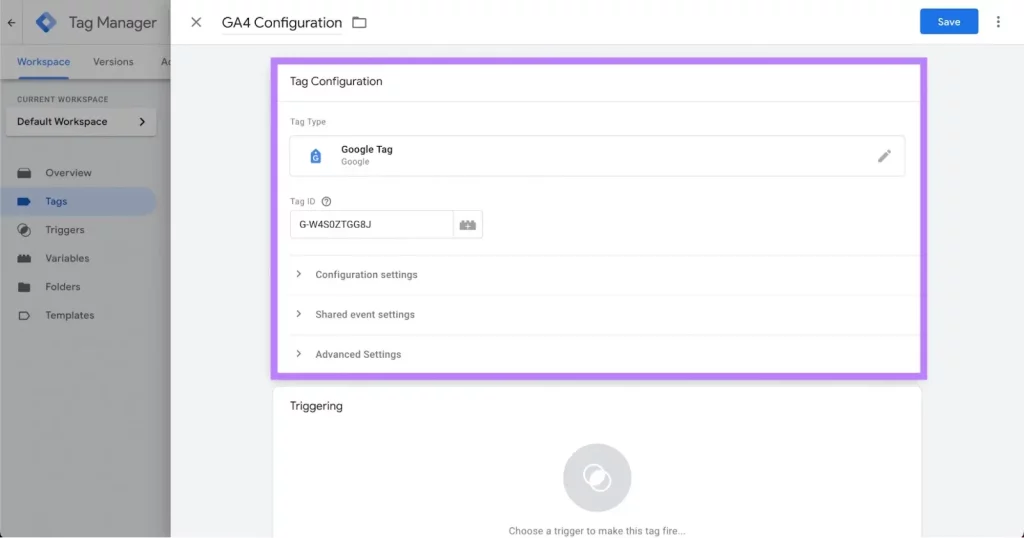
Enter the Google tag ID for your GA4 property, or create a variable to store your Google tag ID for future use.
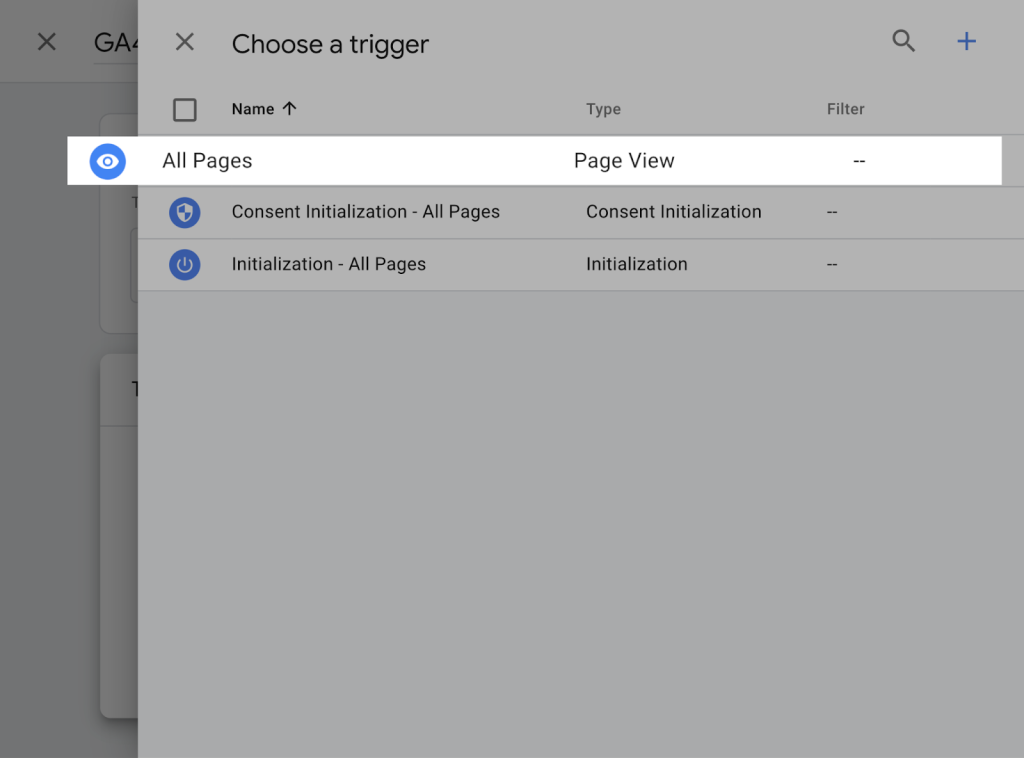
Click the “Triggering” section and choose “All pages.” Then, hit “Save.”
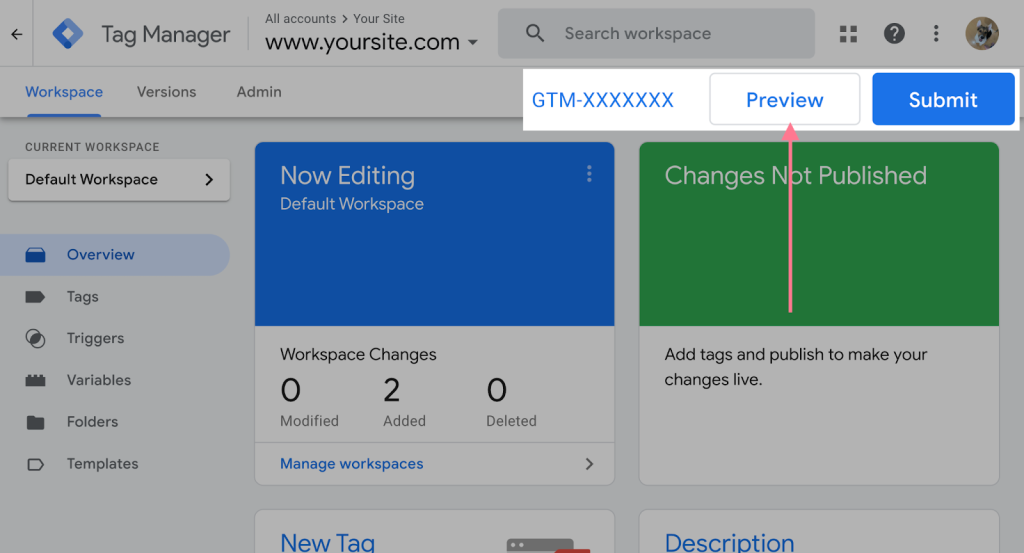
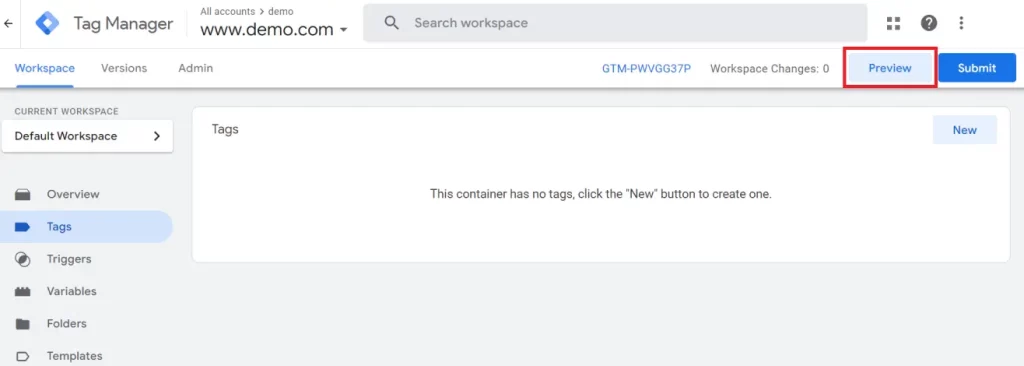
Now, return to the overview page and click “Preview” to test your new changes.
How to Check if Google Tag Manager is Working Properly?
Ensuring that Google Tag Manager (GTM) is functioning correctly is crucial for accurate tracking and data collection. Here are two effective methods to verify that your GTM setup is working properly:
Preview and debug containers
Google Tag Manager’s preview and debug mode lets you navigate a site where your container code is set up as if the current container draft was live. It enables you to test the container setup before publishing. The previewed site links to Tag Assistant, allowing you to see which tags fired and in what sequence.
To use GTM’s Preview and Debug mode, you need to activate it first.
- Click on “Preview,” then enter your site’s URL.
- Certain sites or pages may experience issues due to the inclusion of an extra debug parameter in the URL. If this happens, you can uncheck the “Include debug signal in the URL” box.
- Then, click “Connect.” Your site will open in a new window and show “Connected” in the bottom right corner.
- Return to the Tag Assistant tab and click “Continue” to proceed to the debug interface.
When you have successfully activated the preview and debug mode, a new window will open for the page you specified. This debug interface provides detailed information about your tags, including their firing status and the data being processed. The debug interface is only visible on the browser used to enable preview mode or for shared users, and it does not appear to regular website visitors.
Once you finish verifying tag implementation, exit preview and debug mode.
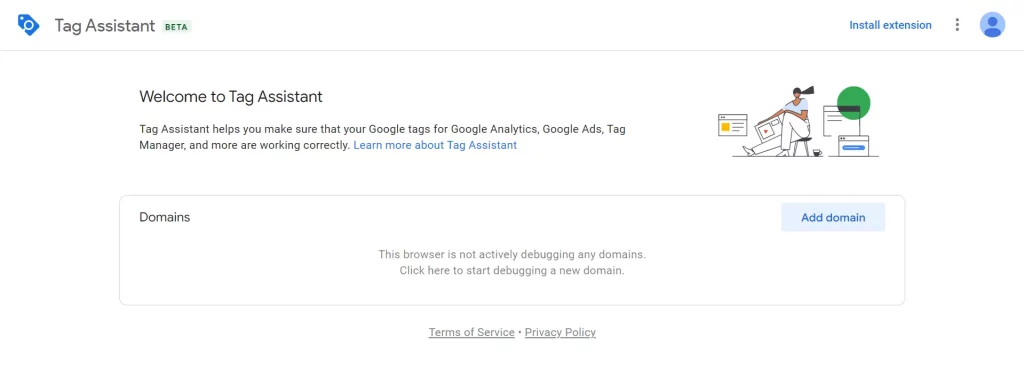
Troubleshoot with Tag Assistant
Tag Assistant is especially helpful in ensuring your tags fire correctly. It allows you to examine the tags, events, and data on your website, export and import debug sessions, and share a debugging URL so you can get help with debugging.
To use Tag Assistant, follow these steps:
- Install the Tag Assistant Chrome extension or go to tagassistant.google.com.
- Click “Add domain.”
- Enter the URL of the website you want to debug, starting with “https://” or “http://”.
- Click “Connect.”
- When you connect Tag Assistant to your website, a debug parameter (_dbg) is added to the end of your URL. The parameter enables you to view events on other debugging platforms, such as Google Analytics DebugView.
After confirming that your tags are firing properly, you can disconnect Tag Assistant.
GTM Common Issues & Solutions
Using Google Tag Manager (GTM) can significantly streamline your tracking and tag management processes, but it’s not without its challenges. Here are some of the most common issues reported by users and the respective solutions:
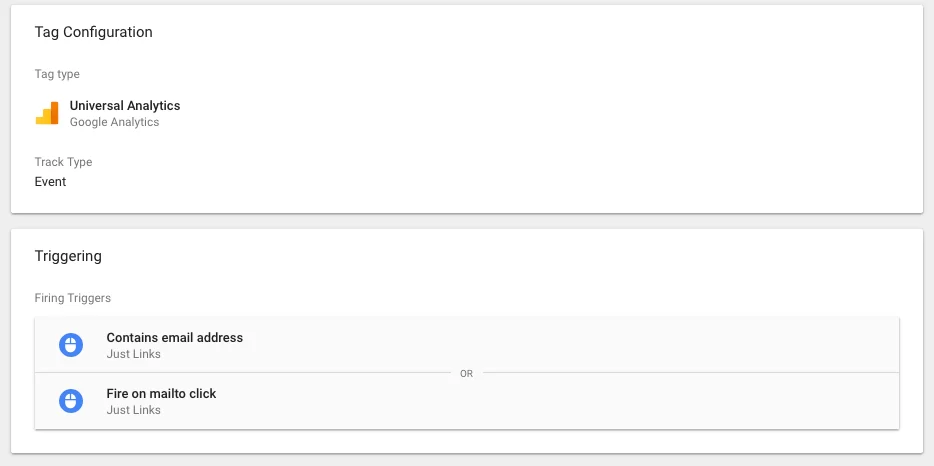
#1 Tag firing incorrectly
Sometimes, having multiple conditions within a trigger can cause a tag to fire incorrectly.
Solution:
Start by checking your trigger settings. Remember that adding multiple triggers to a tag will fire it if any trigger’s conditions are met, whereas multiple rules within a single trigger require all conditions to be met.
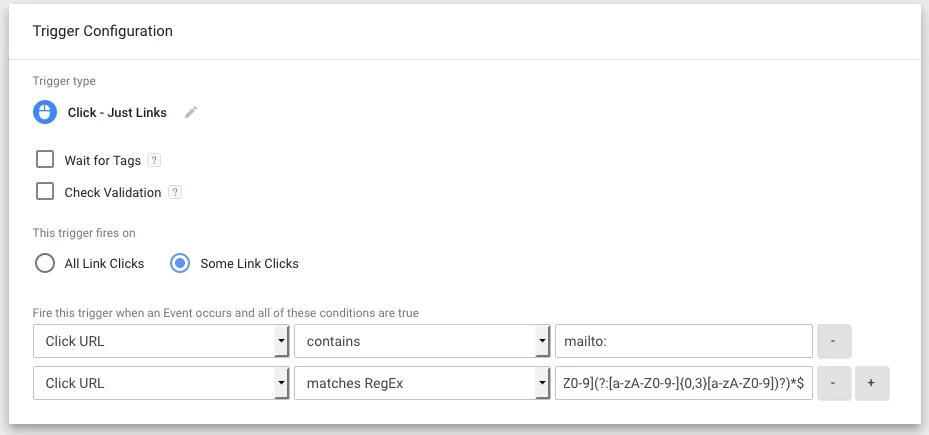
For example, a tag fires if a link click contains an email address or “mailto:”—only one condition needs to be met.
Or, a tag fires only if a clicked link contains both an email address and “mailto:”—both conditions must be met.
#2 Click Tag not firing on click
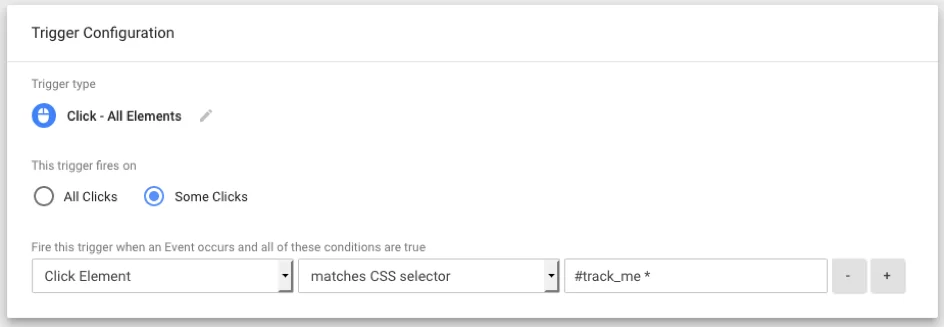
This is the error where you’ve set up a click trigger based on the click element’s ID, class, or a custom attribute, but it isn’t firing when you click on the targeted element.
Solution:
When implementing click triggers, it’s crucial to identify which element the click is registered on, especially with nested elements.
For instance, clicks within a div with the ID track_me might register on various nested elements like images or spans. To track clicks within the track_me div, you need to account for clicks on any child elements. You can do this by using a CSS selector that includes all elements within the track_me div, such as using the * selector in your rule set.
#3 Improper use of the Preview and Debug Console
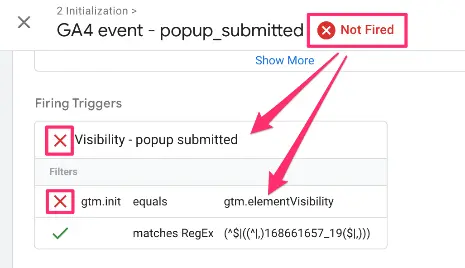
When you choose an event from the left column in the Preview and Debug console, the Tags tab will list the tags active during that event, separated into “Tags fired” and “Tags not fired.”
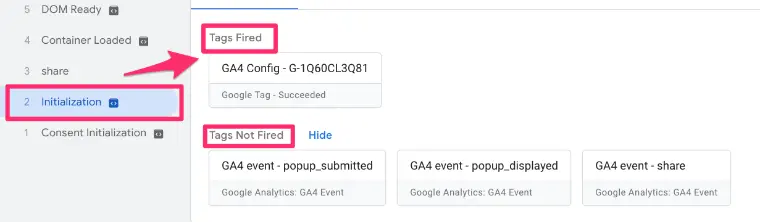
This area helps you understand why a tag didn’t fire. GTM will trigger a tag only if all conditions of a specific trigger are met. A red “X” icon will show which conditions were not satisfied. Use these indicators to diagnose and resolve trigger problems.
#4 Changes not visible
You have updated your GTM container, but the changes are not appearing when debugging.
Solution:
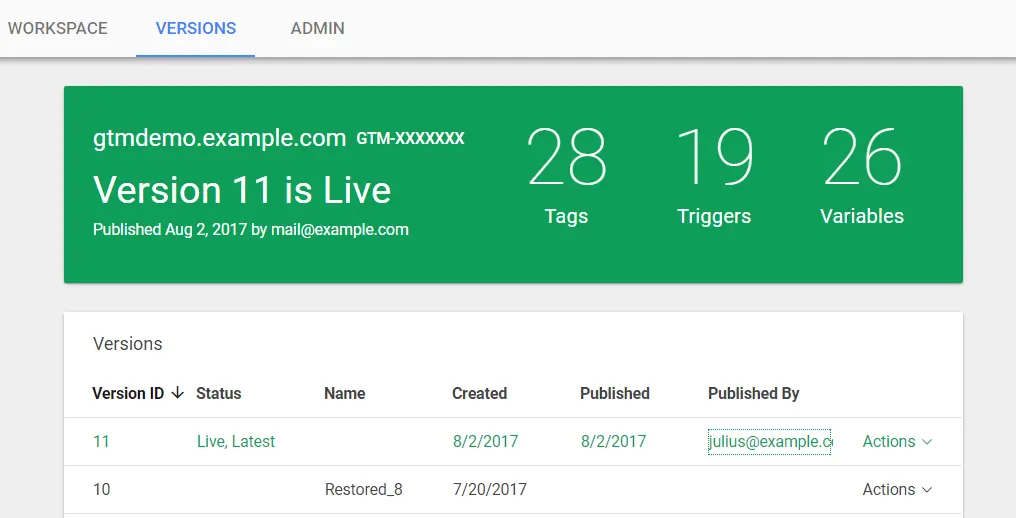
Although it isn’t a highly technical problem, having unpublished versions of a GTM container can lead to tags not firing. This issue is less likely when a single person is managing the container, but it becomes crucial to track live versions when multiple people are involved.
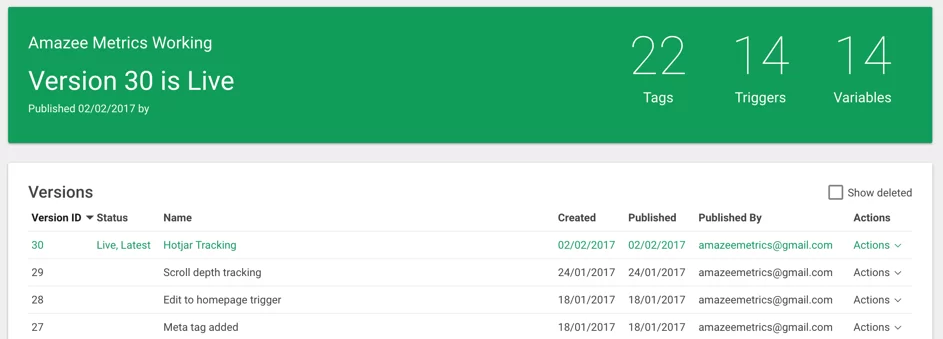
Thankfully, the Versions Tab in GTM makes this easy. Simply click on the Versions Tab in the header to see which version is currently live. To make this process smooth, ensure that your team uses clear and consistent naming conventions for each version.
#5 Tags not being registered in Google Analytics
Even though your tags are firing correctly in GTM, you aren’t seeing any data in your analytics tool.
Solution:
This issue involves verifying data in your analytics tool after testing your tags. In Google Analytics, this is straightforward using the Real-Time report. If your tags fire correctly in GTM but no data appears in GA, check your GA Property ID (UA-XXXXX-X).
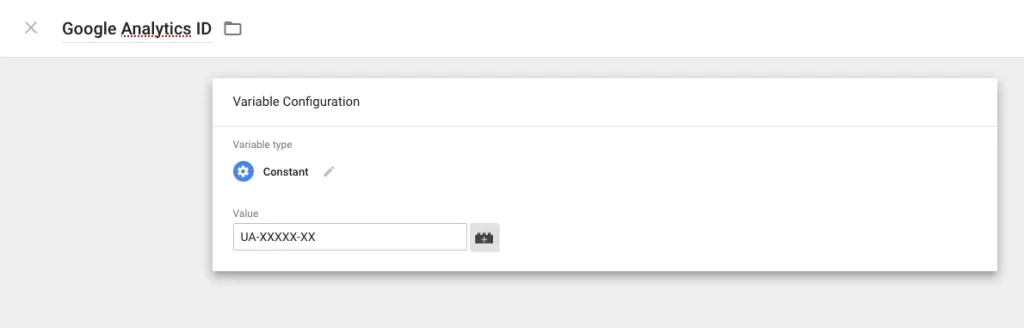
Since this ID must be entered into every GA Tag, there’s a chance of an incorrect entry. To prevent this, create a custom content variable to store the GA Property ID. This way, you can reference the variable using the {{variable name}} syntax in your tags.
Key Takeaway
Google Tag Manager simplifies tag management and deployment, making it an invaluable tool for marketers. By following this guide, you can set up and optimize GTM for your website, ensuring accurate data tracking and improved marketing performance. With the right setup and regular maintenance, GTM can significantly enhance your digital marketing campaigns.